Creating a Dashboard
To set up a dashboard, go to the Ingenious User Interface, on the left menu-bar click Administration -> Dashboards.
At the top of the page, press the +-icon.
Give the new dashboard a name, then click Save
Once the dashboard has been created, open it by pressing the expand button (>-icon) or by right clicking the dashboard row -> Edit Dashboard
The dashboard is now in edit-mode. See Image below:
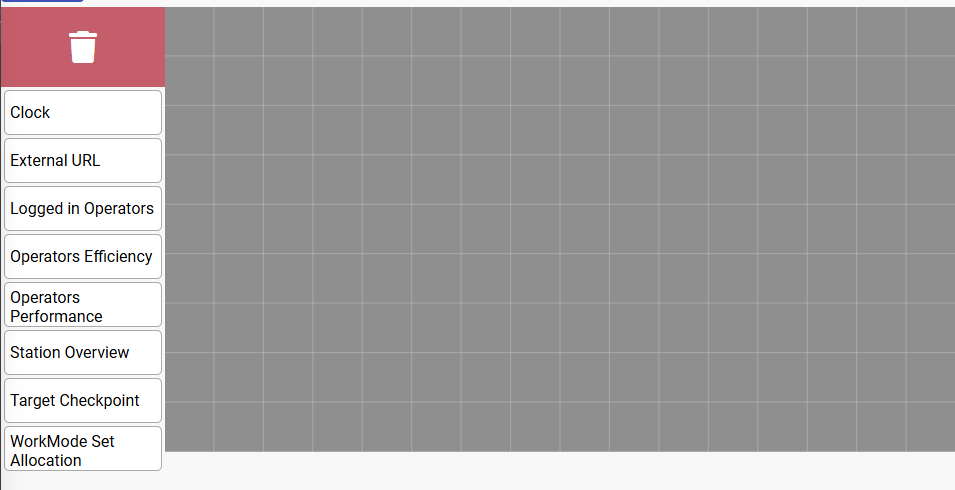
On the left side there is a list of widgets, and above it is a trash can icon which acts as the delete-zone. To the right is the actual grid where the widgets are placed.Click and Drag the clock widget from the left column to the top left corner of the grid and release the mouse button.
The dashboard should look like this; see image below:
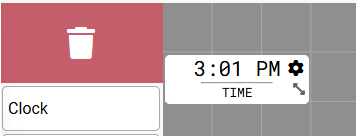
- Take note of the gear icon in the top right corner within the widget boundary. This is the widget settings icon.
- In the bottom right corner you can see the arrows pointing in a diagonal direction, these can be used to resize the widget, click and drag to resize.
Click and drag anywhere on the clock widget (except for the icons) and place the widget in the middle of the dashboard.
To configure this widget, click the gear-icon in the top right corner of the widget boundary.
The settings for the Time widget is now presented, see image below:
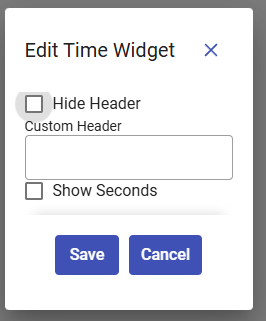
Enter a Custom Header, for example "Clock". Then enable the "Show Seconds"-checkbox and click Save
The widget should now be displaying seconds and have a header that corresponds to what was in the previous step.
To resize the widget, Click and Drag the diagonal arrows in the bottom right corner of the widget boundary. While holding down, move the mouse down and to the right to resize the widget in all directions. Release to confirm the size-change.
Lets delete the widget, Click and hold anywhere on the widget (except for the rightmost icons) and drag it to the red area (trash-icon) and then release the mouse. Widget should now be deleted.