💬 This guide assumes you have completed the basic administration guides as well as the creating a buffer operation guide.
An overflow buffer only starts to be activated once the normal destination is full, this is in contrast to a normal in-route buffer operation where every carrier will go to the buffer before reaching the next operation.
Let's set up an overflow route for the "Sewing" operation so that the carriers enter the buffer only when the station for the sewing operation is full.
Creating an Overflow Route
- Navigate the menu to Administration > Routes
- Click ➕ to add a new route
- In the name input, enter "Sewing Overflow"
- In the type dropdown, select "Overflow"
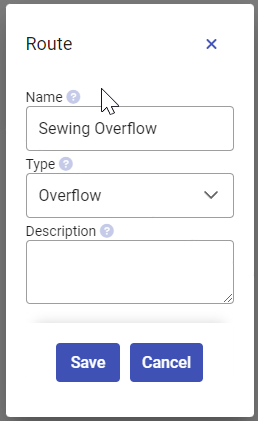
- Press Save
Tip
💡 Multiple operations may use the same overflow route
Setting up the route operation
Let us add the operation we created in the guide creating a buffer operation to this route.
- Open up the newly created route by clicking ▶️ on the lefthand side of the row
- Since this is a new route, the "Operations" tab will be selected by default
- Click ➕ to add an operation to the route
- Select the "Buffer" operation in the operation dropdown
- In the input below the station group dropdown, enter "1004" and press enter. This will assign station 1004 as our overflow station.
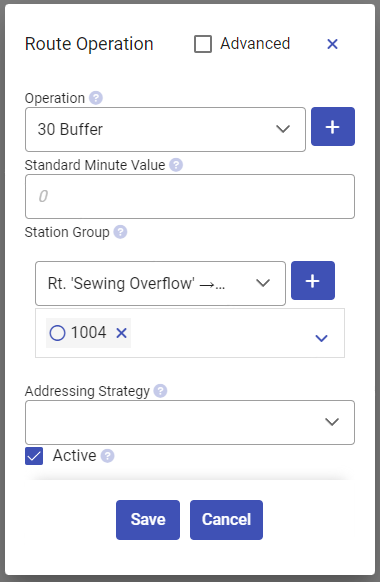
- Press Save in the dialog.
- Press the green Save button and confirm once again.
Tip
💡 An overflow can be added to any operation, except loading operations. When editing a loading operation this field will be disabled. If you want to have overflow set up for when carriers will not fit on the loading stations this should instead be set up on the empty carrier return operation.
Assigning the Overflow Route to an Operation
Now that we have the overflow route, it must also be assigned to one or more operations.
- Navigate the menu to Administration > Routing > Routes
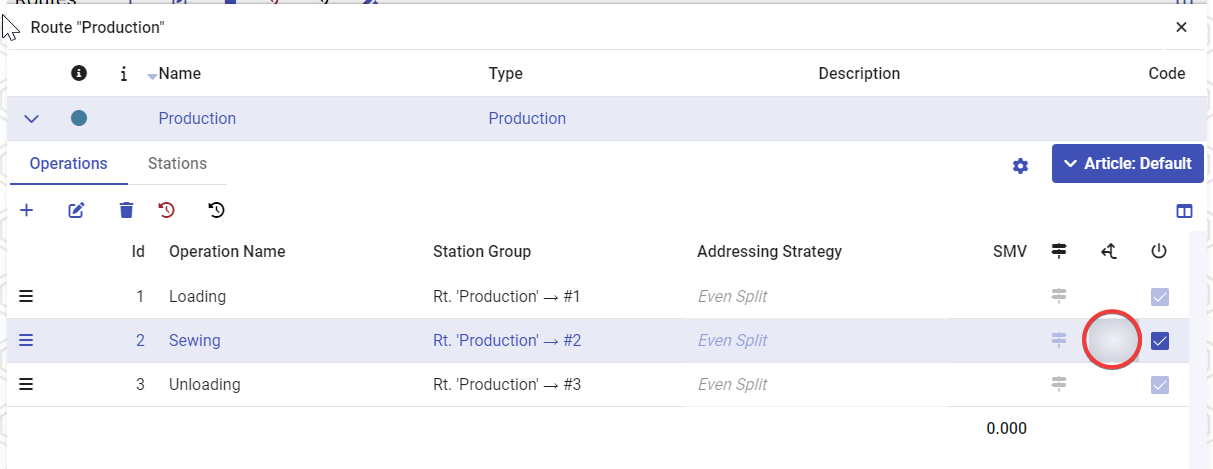
- Open the operation list for our production route by pressing ▶️
- Switch to the "Operations" tab
- Double click the column with the arrow header, on the row for the Sewing operation
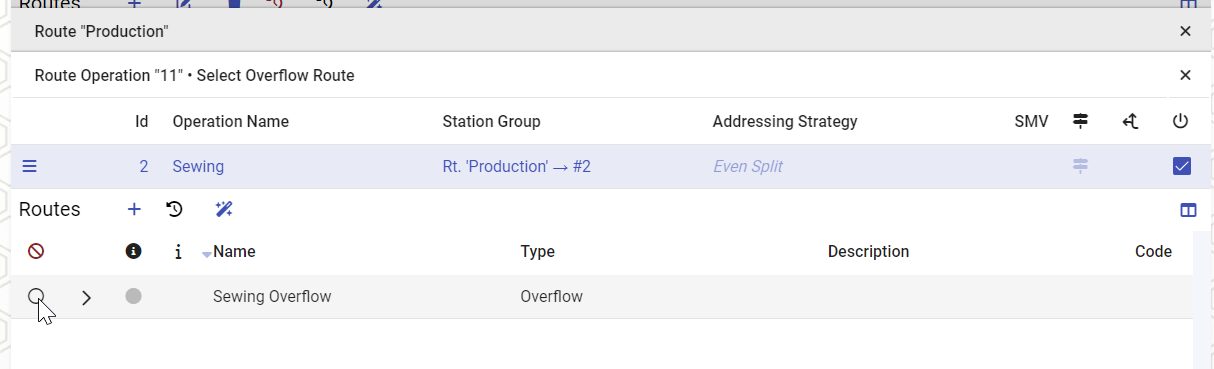
- This will open the route list, showing only overflow operations.
- Select the "Overflow Route" by checking the radio button.
- Press the Save button, then confirm.
Tip
💡Overflow can also be set up on the operation level, this will apply to all routes using this operation. This is done by editing the operation via Administration > Operations > Operations.
Setting Up the Overflow Station
We need to configure a buffer logic on the buffer for it to send out carriers automatically.
- Navigate the menu to Station Settings
- Select station 1004 in the list
- Press the 📝 button to begin editing the settings
- Enable the "Automatic" checkbox
- In the "Buffer Logic" dropdown, select Mixed. This type of buffer can send to a variety of destinations.
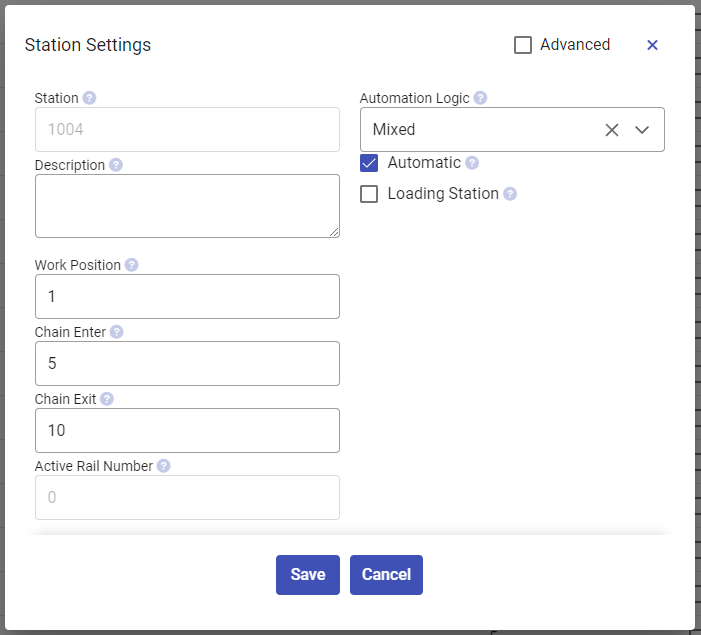
- Press Save.
Tip
💡 Mixed is useful when there can potentially be a mix of different products in the same buffer. If all articles in the buffer will follow the same route, you can instead opt for a simpler "FIFO" buffer type.
Testing the Overflow Route
- Overflow is now be set up and ready for use!
- To test it, follow the production guide and keep sending carriers to the sewing operation.
- Do not perform the sewing operations, just let the carriers accumulate on the rail.
- When the sewing station has reached the maximum capacity, carriers will instead start going to 1004.
- Once you have a few carriers on the overflow buffer (1004), do some sewing operations on station 1002.
- The overflow buffer will start sending once there is enough free space on 1002.