This is general help for getting started with using the Eton UI.
Login
First step to using the Eton UI is to log in with your user account. This is done by navigating a web browser to the URL set up by the administrator of the system.
In many cases this url will be https://eton.systems but this is not always the case if the administrator has not added support for https. In this case, ask your IT administrator for the URL and make sure you are on the correct local network when trying to connect.
The first screen you will see is the login screen. This has two inputs, your username and your password. The supervisor or administrator should have set up an account and given you the details.

Input your username in the "Username" field and your password in the "Password" field. Click the Login button to proceed. If the login succeeds you will see the welcome page.
Side Menu
To navigate between different pages, you must use the side menu navigation. If you are on a device with a small screen you must first click the "hamburger" icon in the top left of the screen to access the menu.
On a bigger screen, the menu will always be visible.
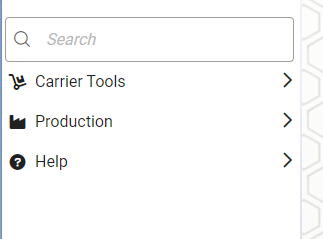
Menu items with an arrow ">" will expand to show more options. Click on a menu item to navigate to that page. The menu items can also be searched by using the search box above the menu. The menu will only show pages that the logged in user has permission to access. Non logged in users may also have permission to view certain pages.
Grid
Many of the interface pages in Eton are available as grids with columns and rows.
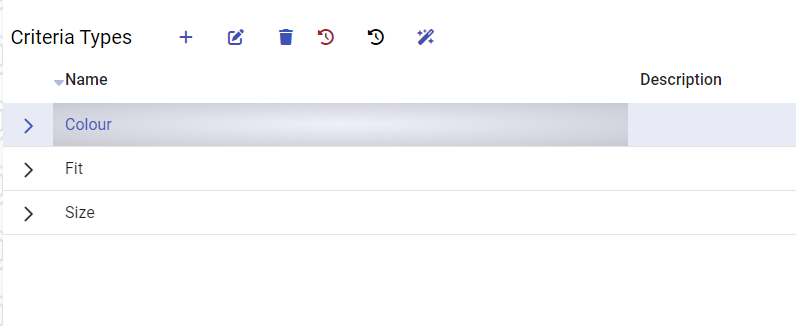
Each grid normally has a toolbar to access different functionality. Some options are only available when a row is selected.
Select a row by clicking on it once with the mouse.
Available buttons may vary a bit depending on which page you are on, but the normal options are the following.
[➕] Plus button
Add a new item to the list. A dialog will be displayed where you can fill in the required fields.
[🖋️] Edit button
Edit an item. This option will only be displayed if a row is selected. This will open a dialog where you can edit each individual property of the item. Properties that are not displayed in the grid can also be edited via this editor.
[🗑️] Delete button
Delete an item. This will remove the item from the grid (and from the system). If there are different items depending on this item, the delete may fail and in this case you must first delete the dependant items before you can delete this item.
[🕑] Audit button (red)
This will open the audit interface that will display changes made on the selected row.
[🕑] Audit button (black)
This will open the audit interface, but show changes on all items in the grid.
[🪄] Wizard
This is only available on some pages. The production wizard will allow you to quickly add many items at once.
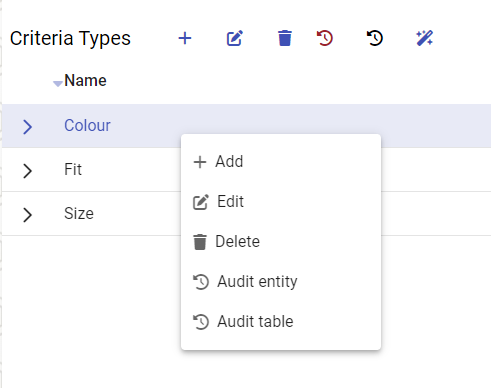
Context Menu
Right clicking on a row (or long press on an Android device) will bring up the context menu. This has similar options to the top menu, with some extra options on certain pages.